Installing a water ionizer filter involves careful planning, precise connection of components, and adherence to safety protocols. Proper installation guarantees peak performance, prevents leaks, and extends the system’s lifespan. As we walk through each step, it’s essential to understand the technical details and common pitfalls. This process can be straightforward if approached methodically, but overlooking key aspects may compromise functionality. Let’s examine the critical procedures to ensure your system operates reliably from the start.
Key Takeaways
- Select a compatible filter based on your water ionizer model and follow manufacturer instructions for installation.
- Gather necessary tools like wrenches, screwdrivers, and Teflon tape before starting the setup process.
- Turn off the main water supply and connect the inlet hose securely to the cold water line using a T-valve.
- Replace filters carefully, ensuring proper sealing and following flushing procedures to remove air and debris.
- Check for leaks, verify water flow, and measure pH and ORP levels to confirm proper installation and system performance.
What Is a Water Ionizer Filter and Why Do You Need One?
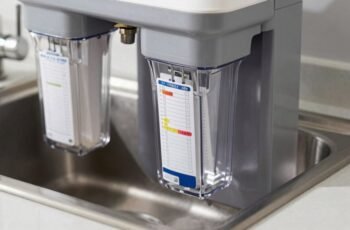
Have you ever wondered how water ionizers produce alkaline water? A water ionizer filter is a specialized device designed to purify and modify water chemistry through filtration and electrolysis. It typically contains multiple filtration stages, including activated carbon and mineral filters, to remove contaminants and impurities such as chlorine, heavy metals, and sediments. The core component is the electrolysis chamber, where an electrical current separates water into alkaline and acidic streams. This process increases the pH of the water, creating alkaline water with antioxidant properties. Without a high-quality filter, impurities could compromise the electrolysis process, reducing efficacy and potentially introducing harmful substances. Hence, a reliable water ionizer filter is essential for ensuring clean, safe, and ideally processed alkaline water.
Choosing the Right Water Ionizer Filter for Your System
Selecting the appropriate water ionizer filter requires careful consideration of system compatibility, ensuring the filter fits specified models and performance requirements. We must evaluate filter material types for purity, filtration efficiency, and longevity, matching them to water quality needs. Additionally, understanding maintenance routines and replacement intervals is essential to maintain peak system operation and filter effectiveness.
Compatibility With System
Determining compatibility between your water ionizer system and a replacement filter is essential for peak performance and longevity. To guarantee proper fit and function, consider these key factors:
- System specifications: Verify the model number and manufacturer’s recommendations to confirm the filter is designed for your specific system.
- Connection type: Match the inlet and outlet connection sizes and styles to prevent leaks and ensure proper flow.
- Filter dimensions: Confirm the physical size of the filter matches the filter housing to avoid installation issues.
Filter Material Types
Choosing the appropriate filter material is vital to guarantee ideal water quality and system performance. Different filter media serve specific functions, including mineral removal, pH adjustment, and contaminant filtration. Activated carbon is widely used for its adsorption capabilities, effectively reducing chlorine, organic compounds, and odors. KDF media facilitate heavy metal removal and inhibit bacterial growth through redox reactions. Ceramic filters provide physical barriers against particulate matter and bacteria. Ion exchange resins are essential for water softening and specific ion removal, such as arsenic or nitrates. Selecting the right combination depends on your water source composition and desired water properties. It’s important to understand each material’s filtration characteristics to optimize system efficiency and ensure water purity. Proper material choice directly impacts ionizer longevity and water safety.
Maintenance And Replacement
How often should we replace the filters in our water ionizer to maintain ideal performance? Typically, replacement intervals depend on usage and water quality but follow these guidelines:
- Pre-filter: Every 6–12 months to prevent sediment buildup and protect downstream components.
- Alkaline/ionizer filter: Every 12–24 months, depending on water mineral content and volume processed.
- Post-filter: Every 6–12 months to ensure taste quality and remove residual contaminants.
Regular replacement is essential for optimal filtration efficiency, system longevity, and water quality. Monitoring filter status via manufacturer indicators or scheduled maintenance ensures consistent performance. Using the correct replacement filters specified for your model prevents damage and maintains system integrity.
Preparing Your Space and Tools Before Installation
Before beginning installation, we must identify an appropriate location that allows easy access and minimizes interference with existing plumbing. We also need to gather all necessary tools, such as wrenches, screwdrivers, and Teflon tape, to guarantee a smooth process. Finally, clearing the installation area removes obstructions and facilitates safe, efficient work.
Choose Suitable Location
Have you identified a stable, accessible location for your water ionizer filter? This step is critical for peak operation and maintenance. First, verify the surface is flat and level to prevent instability or leakage. Second, confirm proximity to a cold water supply line and drain to facilitate plumbing connections efficiently. Third, ensure adequate space around the unit—at least 6 inches on all sides—for proper airflow and future servicing. Avoid locations subject to direct sunlight, high humidity, or temperature fluctuations, as these can compromise filter performance. Precise placement minimizes the risk of leaks and simplifies installation. Properly selecting this spot ensures reliable operation and ease of access during routine maintenance, ultimately prolonging the lifespan of your water ionizer filter system.
Gather Necessary Tools
Once you’ve selected an appropriate location for your water ionizer filter, gathering the necessary tools becomes the next step to guarantee a smooth installation process. Essential tools include adjustable wrenches, a pipe cutter or tubing scissors, a screwdriver (Phillips and flat-head), and Teflon tape for sealing threaded connections. You’ll also need a bucket or container to catch residual water, along with replacement filter cartridges if applicable. Make certain you have appropriate fittings and connectors compatible with your water supply and filter model. Use a digital or mechanical pressure gauge if monitoring water pressure is required. Confirm that all tools are in good condition and readily accessible to avoid delays. Proper preparation ensures efficient assembly, minimizes risk of leaks, and facilitates a precise, secure installation.
Clear Installation Area
How can we guarantee a smooth installation process? The key is to prepare a clear, organized workspace. First, identify a stable, flat surface near your water source and electrical outlet, making certain easy access. Second, remove any obstacles or clutter that could interfere with installation, such as tools, packaging, or stored items. Third, verify the area’s cleanliness to prevent debris from contaminating fittings or filters. This systematic approach minimizes disruptions and makes certain accurate assembly. A designated, tidy space allows for precise connection of components and reduces the risk of damage. Proper preparation streamlines the process, saving time and avoiding potential issues during installation, ultimately making certain your water ionizer filter functions efficiently and safely.
Step-by-Step Guide to Installing Your Water Ionizer Filter
Before beginning the installation process, make certain all necessary tools and replacement filters are readily available. Start by shutting off the water supply to prevent leaks during installation. Next, disconnect the existing filter housing, using an adjustable wrench if needed, and carefully remove the old filter, ensuring no debris enters the system. Prepare the new filter by inspecting it for damage and removing any protective caps. Apply thread sealant or plumber’s tape to the filter’s fittings to ensure a watertight connection. Install the new filter into the housing, tightening it securely but avoiding over-tightening that could damage components. Once installed, reassemble the housing, verify all fittings are tight, and turn the water supply back on to check for leaks. Conduct a brief flush cycle to eliminate air and residual contaminants.
Connecting Your Water Ionizer to Your Plumbing System
To connect your water ionizer to the plumbing system, begin by identifying the appropriate inlet point, typically downstream of the main water supply and near the existing cold water line. Once located, follow these steps:
Identify the cold water line downstream of the main supply to connect your water ionizer securely.
- Shut off the main water supply to prevent leaks during installation.
- Install a T-valve onto the cold water line, ensuring a secure fit to avoid future leaks.
- Connect the inlet hose from the T-valve to the water ionizer’s inlet port, tightening fittings to manufacturer specifications.
Ensure all connections are firm and leak-free before proceeding with further installation steps. Using the correct tools and hardware specified by the manufacturer is essential for a secure, functional connection.
Checking for Leaks and Ensuring Proper Water Flow
Have we securely tightened all fittings and connections? This step is critical to prevent leaks that can compromise the system’s efficiency. We should carefully inspect each connection point, ensuring fittings are fully engaged and tightened using the appropriate tools without over-tightening, which could damage components. Next, turn on the water supply and observe the system for any signs of leakage, such as drips or moisture around fittings. Confirm that water flows smoothly through the entire system, with no unusual noises or restrictions indicating blockages or improper installation. We should also verify that the flow rate meets manufacturer specifications, adjusting if necessary. This thorough check guarantees that the water ionizer operates efficiently, minimizes potential damage, and maintains peak water quality.
Tips for Maintaining and Replacing Your Water Ionizer Filter
Regular maintenance and timely replacement of your water ionizer filter are essential to ensuring peak performance and water quality. To optimize filter longevity and efficacy, follow these steps:
- Monitor Usage: Track the volume of water processed to determine when replacement is necessary, typically every 6 to 12 months, depending on water quality and usage levels.
- Conduct Regular Inspections: Check for visible sediment buildup or clogging, and clean the filter housing with a non-abrasive brush when needed.
- Replace Precisely: Use manufacturer-recommended filters and follow installation instructions carefully, ensuring proper sealing to prevent leaks and maintain filtration integrity.
Adhering to these guidelines guarantees consistent performance and prolongs the lifespan of your water ionizer.
Troubleshooting Common Installation Issues
Proper tool use and leak prevention are essential to successful installation. We need to confirm all connections are tight and tools are appropriate for each component. Addressing these points minimizes common issues and ensures system integrity.
Leak Prevention Tips
To prevent leaks during water ionizer filter installation, it’s essential to confirm all connections are properly tightened and securely fitted. First, inspect each fitting to ensure it’s fully engaged without over-tightening, which could damage components. Second, verify that O-rings or gaskets are correctly seated in their designated grooves, preventing water escape. Third, test all connections by slowly turning on the water supply and observing for drips or moisture. If leaks persist, disassemble and reassemble connections, applying appropriate torque. Consistent inspection and cautious assembly are critical. Properly fitted components minimize the risk of leaks, guaranteeing ideal performance and longevity of the system. These steps are key to a secure, leak-free installation.
Proper Tool Usage
Using the correct tools during water ionizer filter installation is crucial for troubleshooting and resolving common issues efficiently. Precision screwdrivers, adjustable wrenches, and tubing cutters are indispensable for secure connections and proper assembly. Always verify tool compatibility with fittings and components to prevent damage. A digital multimeter allows for testing electrical connections, guaranteeing the system functions correctly. When tightening fittings, avoid over-tightening to prevent cracks or leaks, and use a torque wrench if specified by the manufacturer. Properly functioning tools help maintain the integrity of the installation, minimize leaks, and guarantee system longevity. Familiarity with these tools and their correct application reduces troubleshooting time, ensures a safe setup, and assures peak performance of your water ionizer filter system.
How to Verify Your Water Ionizer Is Working Correctly?
Ensuring your water ionizer functions correctly is essential for peak performance and safety. To verify proper operation, follow these steps:
- Measure the pH level: Use a calibrated pH meter or test strips to confirm the alkaline water reaches the manufacturer’s specified pH range, typically 8.5–9.5.
- Check ORP levels: Use an ORP (oxidation-reduction potential) meter to ensure the water’s ORP falls within the expected alkaline range, usually between -200 to -400 mV.
- Inspect water flow: Confirm that water flows steadily without leaks, and that the ionizer produces a consistent output rate, indicating proper filtration and electrical functioning.
These checks ensure your system produces safe, correctly ionized water.
Final Tips for Safe and Effective Water Ionizer Filter Installation
Properly installing your water ionizer filter is vital for peak performance and safety; consequently, attention to detail during the process can prevent future issues. Make certain all connections are tight and free of leaks by thoroughly inspecting fittings and seals. Use the manufacturer-recommended tools and follow the specific installation instructions precisely. Verify that the filter is correctly oriented according to flow direction markings to maximize filtration efficiency. Avoid overtightening fittings, which can cause damage or compromise seals. Before finalizing, run water through the system for a few minutes to clear any debris and check for leaks. Regularly inspect the filter and connections post-installation to maintain ideal operation and safety, replacing filters as recommended to preserve water quality and system longevity.
Frequently Asked Questions
Can I Install a Water Ionizer Filter Myself Without Professional Help?
Yes, you can install a water ionizer filter yourself if you follow the manufacturer’s detailed instructions carefully. We recommend turning off water supply, having proper tools ready, and ensuring all connections are secure to prevent leaks during installation.
What Tools Are Essential for Water Ionizer Filter Installation?
Think of tools as the keys to a successful installation; essential items include adjustable wrenches, Phillips and flathead screwdrivers, pliers, Teflon tape, and a water pressure gauge. These guarantee a precise, leak-free setup every time.
How Long Does a Typical Water Ionizer Filter Last Before Replacement?
Typically, a water ionizer filter lasts between six to twelve months before replacement, depending on usage and water quality. Regularly monitoring filter performance guarantees ideal filtration efficiency and maintains the health benefits of ionized water.
Are There Specific Safety Precautions During Installation?
Think of installing a water ionizer filter as steering a delicate dance—always wear gloves, shut off water supply, and follow manufacturer instructions meticulously to prevent leaks, damage, or safety hazards during the process.
Can a Water Ionizer Filter Be Installed on Any Water Supply Line?
Yes, a water ionizer filter can typically be installed on any standard water supply line, but we recommend verifying compatibility with your specific plumbing system and ensuring it meets local plumbing codes for safe, effective operation.
Conclusion
By following these detailed steps, we guarantee our water ionizer operates at peak efficiency, seamlessly blending performance with safety. Proper installation not only safeguards against common issues but also optimizes water quality and system longevity. With careful attention to each connection and maintenance, we create a reliable setup that supports healthy hydration. Embracing these precise practices allows us to enjoy the benefits of clean, ionized water with confidence and peace of mind.