Studies show that nearly 60% of water ionizer users experience performance issues within the first year. Addressing these problems promptly can prevent costly repairs and guarantee ideal water quality. Understanding the common signs of malfunction and proper maintenance techniques is vital for sustained device efficiency. If you’re facing irregular pH levels or unexpected error messages, knowing where to start can make all the difference—so, let’s explore the essential troubleshooting strategies.
Key Takeaways
- Identify signs of malfunction such as inconsistent pH, low hydrogen output, and water taste changes.
- Regularly inspect and clean electrodes and replace filters to prevent mineral buildup and clogging.
- Test input water quality and ensure proper calibration for stable pH and optimal ionization.
- Follow error code instructions, reset the device, and seek professional repair for persistent issues.
- Maintain proper water flow and pressure, checking for obstructions and ensuring components are clean and functioning.
Common Signs Your Water Ionizer Isn’t Producing Alkaline Water Properly
When your water ionizer is not functioning correctly, it often exhibits specific, measurable signs indicating it’s not producing the desired alkaline water. One primary indicator is inconsistent pH levels; samples may show fluctuating or lower alkalinity than programmed. You might notice reduced hydrogen concentration, resulting in water that lacks the expected antioxidant properties. Additionally, the water’s taste can shift, becoming flat or metallic, signaling improper ionization. A significant sign is a decrease in overall water flow rate, which suggests clogging or electrode inefficiency. If the machine displays error messages or fails to reach preset pH targets, these technical signals confirm malfunction. Recognizing these signs helps pinpoint issues related to ionization performance, ensuring timely troubleshooting and maintenance to restore ideal alkaline water production.
How to Check and Clean Your Water Ionizer Filters and Electrodes
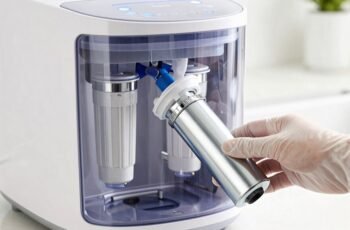
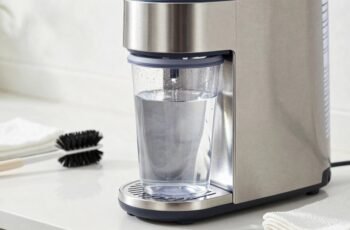
Regularly checking and cleaning your water ionizer’s filters and electrodes is vital to maintain peak performance. To inspect the filters, turn off the unit, remove the filter housing, and examine for mineral buildup or clogging. Replace filters according to manufacturer guidelines or if they appear visibly degraded. For electrode cleaning, disconnect the power supply, then carefully remove the electrode plates. Use a soft brush and a non-abrasive cleaner or a mixture of water and vinegar to remove mineral deposits. Rinse thoroughly with clean water before reassembling. Confirm all components are dry before reconnecting power. Regular maintenance prevents scaling, guarantees efficient ionization, and prolongs the lifespan of your device. Accurate cleaning and inspection are critical for consistent water quality and device longevity.
Troubleshooting Low pH or pH Fluctuations in Your Water Ionizer
Low pH or fluctuations in pH levels can indicate underlying issues with your water ionizer’s operation, which may compromise water quality and device performance. To troubleshoot these problems, we recommend the following steps:
- Check electrode condition—deposits or mineral buildup can cause inconsistent pH levels.
- Verify water input quality—poor or contaminated water can affect ionization efficiency.
- Inspect membrane and filters—clogged or worn components hinder proper pH regulation.
- Ensure proper device calibration—incorrect settings or drift over time can lead to unstable pH outputs.
Addressing these factors helps maintain stable pH levels and ideal device performance. Regular maintenance and precise calibration are essential for consistent water quality.
What to Do When Your Water Ionizer Shows Error Messages or Malfunctions?
Error messages and malfunctions indicate that your water ionizer is experiencing operational issues that can compromise water quality and device longevity. When these occur, immediately consult the user manual to identify the specific error code or message. Many issues stem from power supply problems, electrode fouling, or sensor malfunctions. Begin troubleshooting by resetting the device, ensuring it’s plugged into a stable power source. Check all connections and inspect for visible damage or debris. If error codes persist, perform a system reset or calibration as recommended by the manufacturer. Avoid attempting invasive repairs unless qualified, as this can void warranties. Document any persistent errors for professional diagnosis. Regular maintenance, including cleaning and descaling, helps prevent future malfunctions and prolongs device lifespan.
Ensuring Proper Water Flow and Pressure for Optimal Ionizer Performance
Proper water flow and pressure are crucial for peak ionizer performance. We recommend checking the water supply line for kinks or obstructions, adjusting the pressure settings if necessary, and inspecting for any blockages within the system. Addressing these points guarantees consistent operation and prevents malfunctions.
Check Water Supply Line
Have you verified that the water supply line is delivering an adequate flow and pressure to your ionizer? Guaranteeing proper connection and unobstructed flow is critical for ideal operation.
- Inspect the supply line for kinks or damage that could restrict water flow.
- Confirm the connection fittings are secure and leak-free to prevent pressure drops.
- Check for obstructions or debris within the line that may impede water delivery.
- Measure water pressure at the inlet to ensure it meets the manufacturer’s recommended range, avoiding fluctuations that compromise performance.
Adjust Water Pressure Settings
To enhance the performance of your water ionizer, adjusting the water pressure settings is essential, especially if you notice inconsistent ionization or fluctuation in water flow. Proper pressure ensures stable electrolytic reactions and consistent water quality. To fine-tune the pressure, refer to the device’s manual for specific thresholds. Use the pressure adjustment valve to modify flow rate, monitoring the display or gauge for accuracy.
| Adjustment Parameter | Recommended Setting |
|---|---|
| Water Pressure Range | 30-40 PSI |
| Flow Rate | 1-2 liters per minute |
| System Stability | Maintain steady pressure |
Consistent pressure prevents fluctuations, guaranteeing ideal ionization efficiency and prolonging device lifespan.
Inspect for Blockages
How can we guarantee that water flows smoothly through the ionizer without disruption? Regularly inspecting for blockages is essential. Blockages can considerably impede water flow, reducing efficiency and affecting water quality. To ensure peak performance, we need to:
- Check inlet filters for debris or mineral buildup, cleaning or replacing as needed.
- Examine internal tubing for kinks, clogs, or deposits that restrict flow.
- Inspect the electrodes and surrounding areas for mineral deposits or buildup.
- Verify that drain paths are clear, preventing backflow or pressure issues.
Performing these steps precisely minimizes pressure loss and promotes consistent ionization. Maintaining clean, unobstructed pathways ensures the unit operates efficiently, extends its lifespan, and provides high-quality water output.
Steps to Fix Odor or Contaminant Issues in Your Water Ionizer
To address odor or contaminant issues, we recommend regularly cleaning the electrodes to prevent buildup that can cause odors. It’s also essential to verify the water source quality and replace filters promptly to maintain water purity. Following these steps guarantees your ionizer functions effectively and produces clean, fresh-tasting water.
Clean the Electrodes Regularly
Regularly cleaning the electrodes is essential for maintaining the best performance and preventing odor or contaminant buildup in your water ionizer. Proper maintenance guarantees maximum ionization efficiency and prolongs device lifespan. To effectively clean the electrodes, follow these steps:
- Turn off the power and disconnect the unit to ensure safety during cleaning.
- Use a specialized electrode cleaning solution to dissolve mineral deposits and contaminants.
- Gently scrub the electrodes with a soft brush, applying even pressure to avoid damage.
- Rinse thoroughly with purified water to remove residual cleaning agents and debris.
Consistent cleaning prevents biofilm formation and mineral accumulation, ensuring your water stays pure and fresh. Adhering to this routine maximizes ionizer performance and extends its operational life.
Check Water Source Quality
Over time, impurities or contaminants in the water source can lead to odors or degraded water quality from your ionizer. These issues often originate from dissolved organic matter, bacteria, or minerals present in the source water. To address this, we recommend testing the water for common contaminants like iron, sulfur, or chlorines, which can contribute to unpleasant odors and affect ionization performance. Use a reliable water testing kit to identify specific impurities, and verify the water’s overall quality. If contaminants are detected, consider sourcing water from a cleaner supply or implementing pre-filtration methods before it enters the ionizer. Proper assessment of your water source is crucial to guarantee ideal operation and prevent persistent odor or quality issues caused by dirty or contaminated input water.
Replace Filter When Needed
When odor or contaminant issues arise in your water ionizer, replacing the filter is often an essential step to restore water quality. Over time, filters accumulate impurities and biological growth that compromise taste, odor, and safety. Prompt replacement guarantees best filtration efficiency.
- Identify signs of filter saturation: unpleasant odors, discoloration, or decreased flow rate.
- Turn off the unit and disconnect from power to prevent damage.
- Remove the existing filter carefully, following manufacturer instructions.
- Install a certified replacement filter, ensuring proper sealing and alignment for maximum filtration performance.
Regular filter replacement maintains water purity, prevents buildup of harmful contaminants, and prolongs your ionizer’s lifespan. Proper timing is vital for consistent, high-quality water output.
When to Seek Professional Repair or Replacement for Your Water Ionizer
Identifying the appropriate time to seek professional repair or replacement for your water ionizer is essential for maintaining peak function and safety. Persistent issues such as inconsistent pH levels, unresponsive controls, or persistent error messages indicate that professional evaluation is necessary. Additionally, if your unit exhibits physical damage, unusual noises, or leaks, immediate repair or replacement is warranted. The table below summarizes key indicators:
| Issue | Recommended Action | Urgency |
|---|---|---|
| Decreased ionization efficiency | Schedule professional service | High |
| Frequent error codes | Contact technician immediately | Urgent |
| Physical damage or leaks | Replace or repair promptly | Critical |
| Unusual noises or vibrations | Seek repair to prevent further damage | High |
| Routine maintenance overdue | Professional check-up recommended | Moderate |
Prompt professional intervention ensures safety and preserves your unit’s lifespan.
Frequently Asked Questions
How Often Should I Replace My Water Ionizer’s Filters?
We recommend replacing your water ionizer’s filters every 6 to 12 months, depending on usage and water quality. Regular replacements guarantee peak filtration efficiency, maintaining water purity and ionizer performance for consistent, healthy alkaline water production.
Can Hard Water Affect My Water Ionizer’s Performance?
Hard water can considerably impact your water ionizer’s performance, much like mineral buildup clogging delicate machinery. We’ve seen mineral deposits reduce efficiency by up to 30%, emphasizing the importance of water softening for ideal operation.
Is It Safe to Use Vinegar for Cleaning the Electrodes?
Yes, vinegar is safe for cleaning electrodes in small amounts, as its acetic acid effectively dissolves mineral buildup. We recommend diluting vinegar with water and rinsing thoroughly afterward to prevent corrosion or residue that could impair performance.
How Do I Reset My Water Ionizer After an Error?
To reset your water ionizer after an error, we press and hold the reset button typically located on the control panel for 3-5 seconds, then release. Consult your user manual for model-specific instructions and error code explanations.
What Are the Signs of a Failing Electrolysis Membrane?
Signs of a failing electrolysis membrane include decreased pH levels, uneven ionization, and reduced water quality. Ironically, these issues often seem subtle, yet they signal the membrane’s declining efficiency and the need for timely maintenance or replacement.
Conclusion
In troubleshooting our water ionizer, we remember that “an ounce of prevention is worth a pound of cure.” Regular maintenance, timely inspections, and understanding common signs of malfunction help us optimize performance and extend device lifespan. By following these detailed steps, we guarantee consistent water quality and avoid costly repairs. Staying proactive and attentive to our ionizer’s needs keeps it functioning at peak efficiency, safeguarding our health and investment in the long run.