Many assume that changing the pre-filter is a simple task, but neglecting proper procedures can compromise your water quality and system longevity. We recognize that maintaining consistent filtration performance requires precise steps and timing. If you want to guarantee your water remains pure and your system functions at its best, it’s essential to recognize the signs that indicate a filter replacement is due. Let’s explore how to do this correctly and avoid common pitfalls.
Key Takeaways
- Replace the pre-filter every 6 to 12 months or when water flow decreases significantly.
- Signs for replacement include cloudy water, bad odors, sediment buildup, or reduced flow rate.
- Always turn off water, release pressure, and carefully unscrew the filter housing before replacing.
- Ensure correct orientation and proper sealing during installation to prevent leaks and maintain performance.
- Regularly inspect and monitor the filter’s condition to ensure optimal water quality and system longevity.
How to Identify When It’s Time to Replace Your Pre-Filter
Knowing when to replace your pre-filter is essential for maintaining ideal water ionizer performance. We recommend monitoring the filter’s pressure gauge; a consistent increase indicates clogging and reduced flow rate, signaling the need for replacement. Additionally, observe water quality: if you notice a decline in water clarity or taste, the pre-filter may be saturated with contaminants. Regularly inspect the filter for visible buildup, discoloration, or sediment accumulation. Manufacturer guidelines typically specify replacement intervals—usually every 6 to 12 months—but this can vary based on water quality and usage. Using a TDS meter to measure total dissolved solids before and after filtration can also help determine filter efficacy. When these indicators appear, replacing the pre-filter guarantees effective filtration, prevents system strain, and maintains water quality.
Understanding the Role of the Pre-Filter in Water Quality
The pre-filter serves a critical function in protecting the main filtration system by removing larger particulates and sediments before they reach sensitive components. This process enhances water clarity and prevents clogging, thereby maintaining ideal ionizer performance. Understanding this role emphasizes the importance of timely pre-filter replacement to guarantee consistent water quality.
Protects Main Filter
Have you ever considered how a pre-filter safeguards the main filtration system? It acts as the first line of defense by removing larger particulates such as sediment, rust, and debris before they reach the main filter. This prevents clogging and reduces wear on the primary filtration media, extending its lifespan and maintaining peak performance. By filtering out these contaminants early, the pre-filter minimizes strain on the main filter’s finer media, ensuring it can focus on removing dissolved impurities like chemicals and heavy metals. This targeted protection is vital for maintaining consistent water quality and preventing premature filter failure. Ultimately, the pre-filter’s role in shielding the main filter enhances system efficiency, reduces maintenance frequency, and preserves the overall integrity of the water purification process.
Improves Water Clarity
By filtering out larger particles before they reach the main filter, the pre-filter greatly enhances water clarity. This removal process reduces cloudiness caused by sediment, dirt, and suspended solids, resulting in visibly clearer water. The pre-filter’s fine mesh or activated carbon media captures particulates that would otherwise cause turbidity or discoloration. Maintaining water clarity is essential for ideal ionizer performance, as contaminants can interfere with electrolysis and mineral balance. Additionally, clearer water minimizes scaling and fouling within the system, prolonging component lifespan. Regular pre-filter replacement ensures consistent removal of particulates, preserving water quality. Overall, the pre-filter acts as a critical barrier, substantially improving the visual and physical quality of the water entering the ionizer.
Step-by-Step Guide to Removing Your Old Pre-Filter
First, we turn off the main water supply to prevent leaks during removal. Next, we release system pressure to guarantee safe disconnection. Finally, we carefully remove the old pre-filter, noting its orientation for proper installation of the new unit.
Turn Off Water Supply
Before removing the old pre-filter, we need to turn off the water supply to prevent leaks and water damage. Locate the shut-off valve connected to your water line, typically positioned near the filtration unit or under the sink. Turn the valve clockwise until it’s fully closed, ensuring no water flows into the system. Confirm the valve is fully shut by observing the flow indicator or attempting to run water through the system briefly. If your system has a dedicated shut-off valve, use that; otherwise, shut off the main water supply to your home. Properly turning off the water supply is essential to avoid accidental water discharge during filter removal, ensuring a safe and controlled replacement process.
Release System Pressure
After shutting off the water supply, it’s necessary to release any built-up pressure within the system to prevent sudden water discharge when removing the old pre-filter. To do this effectively, follow these steps:
- Open the designated drain valve or faucet connected to the system to allow residual pressure to escape.
- Carefully operate the system’s pressure release button or valve, ensuring controlled depressurization.
- Confirm the absence of water flow from the outlet, indicating that system pressure has been fully released.
This process ensures safety during filter removal and prevents water damage. Proper depressurization is essential before proceeding to disconnect any fittings or remove the filter, maintaining system integrity and operator safety.
Remove Old Filter
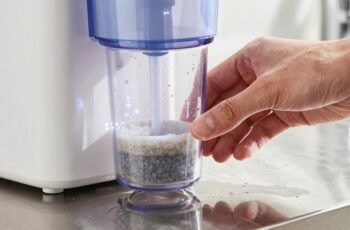
How do we efficiently remove the old pre-filter without damaging the system? First, ensure the system is depressurized and water flow has stopped. Locate the filter housing, typically positioned after the inlet connection. Use a filter wrench or appropriate tool to unscrew the housing cap counterclockwise, applying steady, even pressure to prevent cracks. Carefully lift out the old filter cartridge, noting its orientation for correct installation of the new one. Inspect the housing for sediment or debris, cleaning it with a soft cloth if necessary. Avoid excessive force that could crack the plastic. Handle the filter carefully to prevent damage, and dispose of it according to local regulations. Proper removal minimizes system stress and prepares for a seamless replacement process.
How to Choose the Right Replacement Pre-Filter for Your Water Ionizer
Selecting the appropriate replacement pre-filter for your water ionizer requires careful consideration of compatibility, filtration capacity, and specific contaminant removal. First, verify compatibility by matching the filter model with your device specifications. Second, assess filtration capacity, ensuring it meets your daily water volume to avoid frequent replacements. Third, analyze the contaminants targeted by the filter, such as chlorine, heavy metals, or sediments, and confirm it effectively addresses your water quality concerns. Additional factors include the filter’s pore size for particle removal efficiency and material composition to prevent leaching. Choosing a filter aligned with these criteria guarantees ideal performance and longevity, ensuring your water remains pure and your ionizer functions effectively. Proper selection minimizes maintenance and enhances overall water quality.
Tips for Installing Your New Pre-Filter Correctly
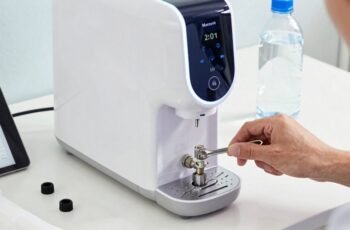
Installing your new pre-filter correctly is vital to guarantee peak performance and longevity of your water ionizer. Begin by verifying the water supply is fully shut off to prevent leaks or pressure issues. Next, carefully remove the old filter, taking note of the orientation and connection points. When installing the new filter, align it precisely with the flow direction indicated on the filter body; improper orientation can compromise filtration efficiency. Tighten the fittings securely using an appropriate tool, avoiding over-tightening which could cause damage. Once installed, open the water supply slowly and check for leaks around fittings. Confirm that water flows smoothly through the filter without obstruction. Proper installation ensures maximum filtration and protects the internal components of your water ionizer from sediment and debris.
How Often Should You Replace Your Pre-Filter?
Regularly replacing your pre-filter is necessary to maintain optimal filtration performance and safeguard your water ionizer’s internal components. Typically, pre-filters should be replaced based on the following criteria:
- Filtration lifespan: Every 6 to 12 months, depending on water quality and usage levels.
- Contaminant load: Higher levels of sediment, chlorine, or particulates may necessitate earlier replacement.
- Flow rate reduction: A noticeable decrease in water flow indicates the filter’s capacity is compromised, requiring replacement.
Adhering to these guidelines ensures consistent water quality and prevents damage to the ionizer’s internal mechanisms. Regular monitoring and timely replacement optimize filtration efficiency and extend device longevity.
Common Signs That Indicate a Pre-Filter Replacement Is Needed
When your pre-filter begins to show signs of reduced performance, it’s a clear indication that replacement is necessary. A noticeable decline in water flow rate often signals clogging from accumulated sediments and particulates. Additionally, cloudy or discolored water suggests the filter’s media is saturated and no longer effectively removing impurities. Unusual odors or tastes in the water indicate compromised filtration, as the pre-filter can no longer trap contaminants properly. Reduced filtration efficiency may also cause increased strain on the ionizer’s internal components, potentially shortening lifespan. Monitoring these signs closely helps guarantee ideal water quality and system performance. Regular inspection for visible buildup or sediment is essential, as ignoring these indicators can lead to system failure or reduced purification effectiveness.
Troubleshooting Pre-Filter Replacement Issues and FAQs
Although replacing a pre-filter may seem straightforward, it can sometimes present challenges that hinder proper installation or function. Common issues include improper sealing, clogging, or flow restriction. To troubleshoot effectively:
- Verify that the filter is seated correctly, ensuring all O-rings are aligned and compressed evenly.
- Check for obstructions or debris in the filter housing that could cause flow issues.
- Confirm the water pressure and flow rate meet manufacturer specifications, as low pressure can impair filtration performance.
FAQs often address concerns like “Why is water flow slow after replacement?” or “How do I reset the system?” For these, ensure the filter is fully seated and consult the manual for reset instructions. Precise troubleshooting prevents damage and guarantees peak performance.
Frequently Asked Questions
Can I Use a Generic Pre-Filter Instead of the Manufacturer’s Recommended One?
Yes, you can use a generic pre-filter if it matches the specifications and filtration standards recommended by the manufacturer. However, we advise confirming compatibility to guarantee the best performance and protection of your water ionizer device.
How Does Water Temperature Affect Pre-Filter Lifespan?
Water temperature is like a speeding train—higher temperatures accelerate filter wear by increasing chemical reactions and bacterial growth, reducing lifespan. Lower temperatures slow this process, extending pre-filter effectiveness, so maintaining ideal water temperature is essential for filter longevity.
Is It Necessary to Sanitize the System During Pre-Filter Replacement?
Yes, it’s necessary to sanitize the system during pre-filter replacement to prevent bacterial growth and maintain ideal water quality. We recommend thoroughly cleaning all components and using appropriate sanitizing agents before installing the new filter.
What Environmental Factors Can Shorten Pre-Filter Effectiveness?
Extreme temperatures, high sediment levels, and chemical pollutants drastically shorten pre-filter effectiveness. These environmental factors accelerate clogging, reduce filtration capacity, and compromise system performance, necessitating more frequent replacements to maintain ideal water quality and device longevity.
Are There Any Health Risks if I Delay Replacing the Pre-Filter?
Delaying pre-filter replacement can lead to bacterial growth and reduced filtration efficiency, which might introduce contaminants into your water. We recommend timely replacements to guarantee ideal health safety and prevent potential health risks associated with compromised filtration systems.
Conclusion
Just as a well-tuned engine relies on clean filters to run smoothly, our water ionizers depend on timely pre-filter replacements to guarantee ideal performance. Staying attentive to signs of clogging and adhering to recommended schedules safeguards your system’s longevity and water quality. Regular maintenance echoes the discipline of a craftsman, preserving the integrity of your filtration process. By prioritizing these steps, we uphold the standards of precision and reliability that define effective water treatment.