Did you know that a water ionizer filter typically needs replacement every 6 to 12 months to maintain peak performance? Properly replacing the filter ensures your device continues to produce high-quality, alkaline water. However, the process involves precise steps that, if overlooked, can lead to leaks or reduced efficiency. Understanding the correct procedure is essential for safe and effective maintenance—so, let’s explore how to replace your water ionizer filter correctly.
Key Takeaways
- Turn off and unplug the water ionizer, then close the water supply valve before opening the filter housing.
- Remove the old filter by rotating or pulling it out carefully, catching any residual water.
- Check filter orientation and install the new filter, ensuring proper gasket placement and a secure fit.
- Close the filter housing tightly and turn the water supply back on, then run water through the system to flush.
- Regularly flush the new filter weekly and monitor water quality for optimal performance and maintenance.
How Do Water Ionizer Filters Work and Why Are They Important?
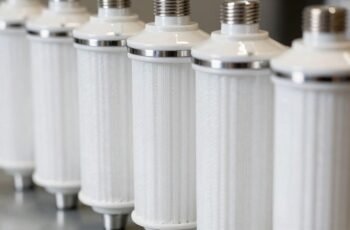
Water ionizer filters function by selectively removing contaminants and impurities from tap water, ensuring ideal conditions for the ionization process. These filters utilize specialized media, such as activated carbon and ion exchange resins, to target specific pollutants like chlorine, heavy metals, and sediments. By eliminating these impurities, the filters improve water quality, prevent scaling, and extend the lifespan of the ionizer. This process maintains optimal pH levels and enhances the mineral composition, which is essential for producing alkaline water with antioxidant properties. The filtration system’s efficiency depends on proper material composition and regular maintenance. Overall, these filters are essential for delivering clean, safe, and health-promoting water, making them a fundamental component of the ionization system.
Signs That It’s Time to Replace Your Water Ionizer Filter
Over time, the effectiveness of your water ionizer filter diminishes as it becomes saturated with contaminants, leading to noticeable changes in water quality. Signs include a decline in water pH consistency, reduced mineral clarity, and a musty or off-taste. Additionally, decreased filtration efficiency may cause increased sediment or particulate presence in the water.
| Sign | Indicator Example |
|---|---|
| Water Taste and Odor | Unpleasant or metallic taste, off-odor |
| pH Level Fluctuations | Inconsistent pH readings during use |
| Sediment and Particulates | Visible particles or cloudiness in water |
Monitoring these signs guarantees timely filter replacement, maintaining ideal water quality and ionizer performance.
Preparing Your Water Ionizer for Filter Replacement
Before removing the filter, we guarantee the ionizer is turned off and unplugged to prevent electrical hazards. This step assures no power flows through the device during maintenance, minimizing the risk of electrical shock. Next, we recommend closing the water supply valve to prevent leaks or water flow while servicing the unit. If your model includes a water flow indicator or display, reset or deactivate it as per the manufacturer’s instructions to prevent false alerts. Additionally, clear the surrounding area of any obstructions to facilitate safe and efficient access to the filter housing. Confirm that the device has cooled down if recently used, as internal components may be hot. Proper preparation guarantees a safe, efficient filter replacement process and maintains the integrity of the water ionizer.
Step-by-Step Guide to Removing the Old Filter
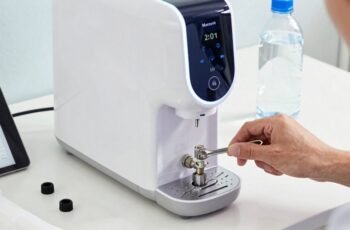
To remove the old filter, we start by locating the filter housing, which is typically accessible from the front or side panel of the water ionizer. Once identified, verify the unit is unplugged to prevent electrical hazards. Carefully open the panel using the designated latch or screws. Next, identify the filter cartridge within the housing, noting its orientation for correct reinstallation. To disengage the filter, grip it firmly, and rotate counterclockwise if threaded, or gently pull if press-fit. Be cautious of residual water; use towels or a container to catch drips. Confirm the filter is completely removed, inspecting the housing for debris or mineral buildup. This precise removal ensures the system is prepared for the new filter installation.
Installing the New Water Ionizer Filter Correctly
Once the old filter has been removed and the housing inspected, we begin installing the new water ionizer filter by aligning it properly with the housing’s inlet and outlet ports. Confirm that the filter’s manifold or connection points match the corresponding ports on the housing. Insert the filter straight into the housing, applying firm, even pressure to seat it fully without forcing. Confirm that the filter’s gasket or sealing surface is correctly positioned to prevent leaks. Tighten any retention mechanisms, such as screws or clamps, securely but without overtightening to avoid damage. Double-check the alignment to confirm there are no cross-connections. Proper installation guarantees seal integrity and maximum flow, preventing leaks and ensuring the filter functions efficiently within the system.
Tips for Maintaining Your Filter and Extending Its Lifespan
Regular maintenance is essential to maximize the lifespan and efficiency of your water ionizer filter. Consistent cleaning involves flushing the filter with clean water weekly to prevent mineral buildup and biofilm formation, which can impair filtration performance. Guarantee the filter housing and surrounding components are free of debris and scale deposits using a soft brush and mild cleaning agents compatible with the system. Monitoring water quality parameters, such as pH and mineral content, helps determine when to replace or regenerate the filter. Avoid exposing the filter to extreme temperatures or direct sunlight, which can accelerate degradation. Additionally, adhere to the manufacturer’s recommended cleaning schedule and replace pre-filters promptly to prevent clogging. Proper maintenance ensures ideal filtration, prolongs filter lifespan, and sustains water quality.
Troubleshooting Common Issues After Replacing the Filter
After replacing your water ionizer filter, it’s common to encounter issues such as inconsistent water flow, abnormal pH levels, or unusual odors. These problems often result from improper installation, air entrapment, or filter misalignment. To troubleshoot, first check that the filter is securely seated and correctly aligned within the housing. Run the water for several minutes to purge trapped air, which can cause fluctuations in flow and pH. Verify the filter’s compatibility with your model, as incompatible filters may produce irregularities. If odors persist, inspect for bacterial growth or stale water in the system. Regular flushing and cleaning of the unit can prevent such issues. Accurate troubleshooting guarantees maximum performance and extends the lifespan of your water ionizer system.
Frequently Asked Questions
How Often Should I Replace My Water Ionizer Filters?
We recommend replacing your water ionizer filters every 6 to 12 months, depending on water quality and usage. Regular replacement guarantees peak filtration performance, maintaining water purity and extending your device’s lifespan effectively.
Can I Use Any Filter Brand With My Water Ionizer?
We recommend using filters specifically designed for your water ionizer’s model and brand. While some universal filters exist, they may not guarantee ideal performance or compatibility, so always check manufacturer guidelines before selecting an alternative brand.
What Safety Precautions Should I Take During Replacement?
When replacing filters, we wear gloves to prevent contamination, turn off the power to avoid electric shock, and guarantee water supply is shut off to prevent leaks, as demonstrated in a recent maintenance safety protocol.
How Do I Know if My Filter Is Genuine or Counterfeit?
We identify genuine filters by checking for official branding, holographic seals, and matching serial numbers with manufacturer records. Counterfeit filters often lack these features and may have inconsistent build quality, so always purchase from authorized dealers.
Will Replacing the Filter Affect the Water’s pH Levels?
Replacing the filter can temporarily alter pH levels as the system recalibrates, but with proper maintenance, it stabilizes quickly. We recommend testing water pH regularly to guarantee ideal alkalinity and consistent quality after each filter change.
Conclusion
Replacing your water ionizer filter is like renewing a crucial bridge—restoring clarity and flow to your water supply. With careful steps, we guarantee the pathway remains unobstructed, safeguarding your health and device efficiency. Regular maintenance acts as the blueprint for longevity, preventing corrosion and buildup. By understanding the process and staying attentive, we uphold the integrity of this technological conduit, ensuring it continues to serve as a conduit of purity and well-being for years to come.